Retrofit Your Wall With a Weep Screed
Weep screed installation is something that many homes and structures lack, and in most situations, that “later on” may be right now! This comprehensive guide will walk you through every step needed to add a weep screed to your current stucco wall or walls.
For older homes, a weep screed may never have been installed. The ramifications of not having a weep screed can be catastrophic. What most people fail to understand is that a stucco wall is not waterproof. Water actually enters into the building during rain, and drains from within the wall down the building paper. As it makes its way to the bottom it exits through a flashing called a weep screed.
When you don’t have a weep screed, water can actually stay inside the building and even enter the building. Which can be a catastrophe.

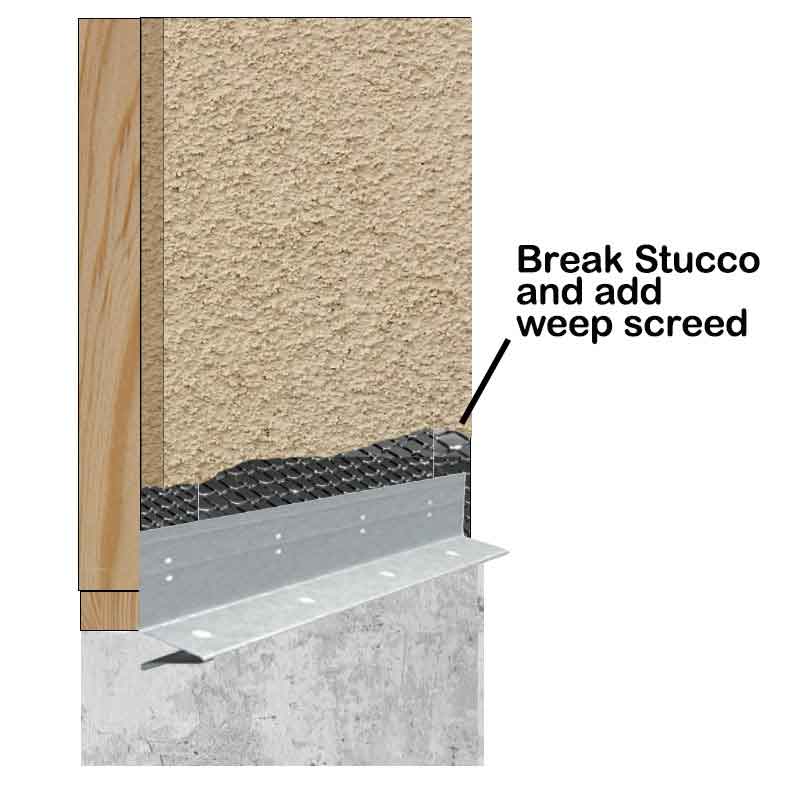
A Typical “Stuccoed” Wall Without Weep Screed…
There would have been no termination point at the base of your walls if you hadn’t put any weep screed, save for the soil or any later installation of pavers, concrete, pavement, etc. Thus, it is most probable that the stucco was applied continuously to these regions, without altering the stucco’s actual plane.
Demolition Is Necessary…
Finding the wall’s bottom plate—basically, the lowest wooden surface—is the first task necessary in order to firmly fasten our weep screed to it. The only method to accomplish this is to begin removing some stucco, beginning at a corner of the wall.
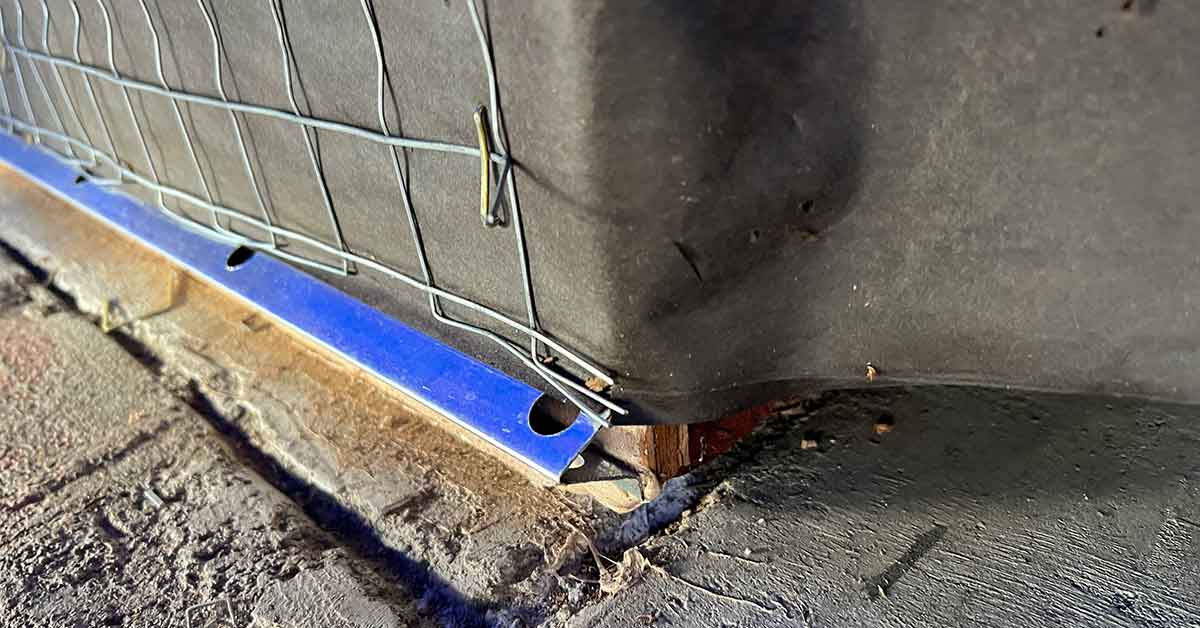
The ideal method for this is to use a hammer or a rotary hammer tool of some kind, which will remove the base coatings and stucco finish while, for the most part, leaving the paper and wire intact. If you wanted to expose the paper and wire for the tie-in, you would still need to break out the perimeter. Alternatively, you could use a grinder and a diamond blade to carve the area out.
Once you have located the junction of the bottom plate and the foundation, you will need to ensure that you have adequate space to attach the new weep screed piece.
Because of the 3 1/2″ flange on the rear of the weep, I would advise breaking out at least 4 inches of stucco above the foundation.
Keeping the same 4″ clearance as on the first break out, you should keep breaking out more stucco until you reach the opposite corner of the wall. To provide a transition point for the new weep screed, you will also need to remove all of the stucco below that is fastened to the foundation.
Cut Off the Staples and Nails
The wire must now be removed from any nails and staples holding it in place, as well as any additional staples that may have been utilized. The tiny staples holding the paper in place must also be removed. Since the weep screed needs to go beneath the paper, this will be crucial.
Hang New Weep Screed Beneath Paper and Wire
Hanging the weep screed on the wall is the next step. To direct water away from any wooden components, the bottom of the weep should be about 1″ below the top of the concrete foundation. If at all possible, make sure the weep is nailed up toward the top of the flange.
Proceed Along The Entire Wall or Walls…
Simply keep going along the wall, adding enough weep to cover any sections that require it. It is advised that you allow each piece to overlap by approximately 1″.
Counter Flash Current Wire and Paper
The next step is to counter-flash the current paper with additional paper, however, we should slide the new paper behind the old one on the wall. Make sure you ascend as high as you can to avoid letting water in.
You should actually strive for a minimum overlap of at least 2 inches, but it’s possible that you have staples or nails that will prevent your new paper from sliding up as much as you would like. Utilizing shorter lengths of paper (12–36 inches), overlap those vertical seams by a minimum of 6 inches.
Slice A New Wire and Remove The Nails
Now, if at all possible, cut a new piece of wire to fit over the patch area so that it overlaps the previous wire by at least 3″. By doing this, future cracking will be avoided. The optimal full overlap is shown in the image below, which will provide a much better “key” when applying the scratch coat.
Put On The Stucco Scratch Layer
The next step in this process is the scratch coat, therefore you will need to prepare some base coat material, either by purchasing a pre-bagged mix or creating your own unique blend.
Try to apply the paint as evenly as you can, covering the entire area with a layer that is between 3/8″ and 1/2″ thick. Next, create horizontal lines in the base coat using a “scratcher” to ensure a strong mechanical bond for the brown coat.
Put on the Stucco Brown Coat.
The next, and almost final, phase in this lengthy procedure is applying the brown coat, which comes right before applying the finish coat. To apply to a dampened scratch coat, you will need to remix a portion of the base coat material used for the scratch coat.
Make sure you apply enough material so that the patch area will be flush with the final layer when you trowel it over.
Once the brown coat has been put, you should wait to float in the base coat material until it becomes thumbprint rigid. In the picture below, I’ve included a green float for this procedure; however, a firm neoprene float works well too, though it’s typically more difficult to locate.
Put on the Stucco Finishing Coat.
It is recommended to allow the brown coat to cure for approximately seven days before to applying the final coat. During this time, make sure to water the brown coat at least twice a day to ensure proper material curing. You only need to add water to the pre-blended finish coat material.
Similar to the brown coat, the finish coat is done in one or two coats, depending on your finish, and is typically only 1/16″ to 1/8″ thick. I’ve included a cat face finish example in this guide, which calls for two coats. Using a trowel, apply the initial coat, and then float it with a green float.
A second coat is sprayed, covering the majority of the surface and leaving random voids in the wall once it has had time to set up (30 minutes to 2 hours).
In most circumstances, painting to match the current hue will be necessary. Adding color to the final coat material itself is an alternative, but achieving a good match is very difficult.